Back to Home | Workbench 3.1 Guide Contents | Site Map
In this chapter we will install and set up Scalos step by step.
If you haven't already, Please follow Chapter 6 - How to Install MUI first before continuing, otherwise the preferences in Scalos will not work.
a. Please make sure you have downloaded and copied Scalos-V1.2b.lha to C:\Program Files\WinUAE\Hard Disks\Programs directory.
You can download Scalos-V1.2b.lha from Here
or from downloads page at: http://scalos.noname.fr
b. Next re-launch the WinUAE program, left click the config you made, click the Load button and click OK/Start to start emulation.
c. When workbench has booted, double click System, double click the next System drawer in the window that opened, and then double click Shell to open Amiga DOS.
d. Now we’ll extract the Scalos-V1.2b.lha archive, So type:
lha x programs:Scalos-V1.2b.lha programs: and press Return/Enter
e. Type in: endcli and press Return/Enter and close all open windows
Installing Scalos: (Please take note of steps 5 and 6, and install MUI first)
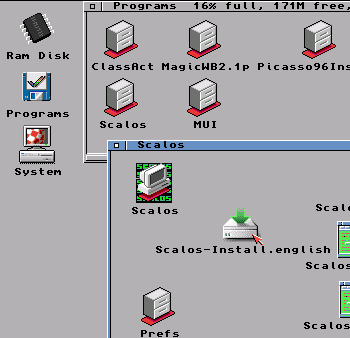
1. Double click Programs, double click on the Scalos directory and then double click on Scalos-Install.english

2. Click ‘Proceed’.
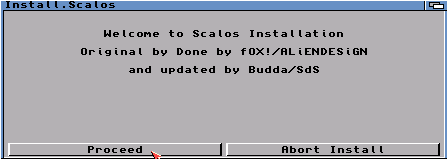
3. Make sure Install for Real and None are selected and then Click ‘Proceed’.

4. Click ‘Proceed’. (It should show SYS:Expansion/Scalos as selected drawer).

5. Click Show Drives button and then click DH0: System:
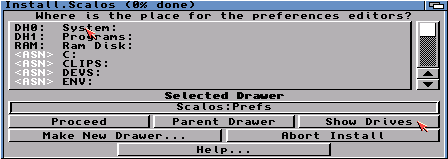
6. Click on Prefs and then click Proceed.

7. Click Proceed (with English ticked, tick any of the other boxes if you speak that language)

8. Click Proceed (with English ticked, tick any of the other boxes if you speak that language)

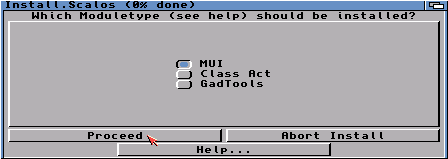
9. Click Proceed. (Make sure MUI is selected)
10. Click Yes.

11. Click Yes.

12. Click Proceed.

13. Click ALL Proceed with Copy buttons.

14. Click the next 2 Proceed buttons to end install.
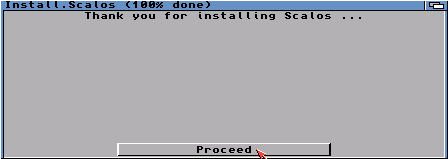
15. Now restart the Amiga by holding down the 3
keys:
CTRL + LEFT WINDOW +
RIGHT WINDOW keys (or press
CTRL + INSERT + HOME in older versions of WinUAE) Or, you could just press
F12 then click reset on bottom
left..
16. When Scalos Workbench screen shows you will see a
small window open. Hold down your left mouse button on
![]() at the
bottom right corner, drag down and right until an outline of
the window fits the whole screen, and then let go of the left
mouse button.
at the
bottom right corner, drag down and right until an outline of
the window fits the whole screen, and then let go of the left
mouse button.

17. Next double click System, then double click the Prefs directory and double click Scalos Menu Icon (As you can see the icons are in a mess so I have drawn a yellow box showing where this icon is)

18. When Scalos Menu window opens, go to the top of the screen, hold down your right mouse button and hover your mouse over Project then Open... When Open... is highlighted let go of your right mouse button.
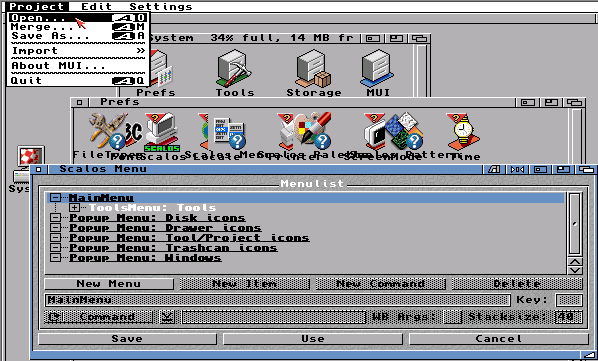
19. Left click on Scalos Drawer

20. Click on Menu.pre to select and click on OK
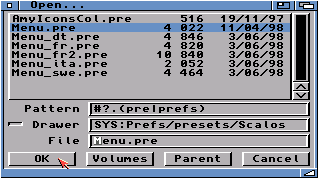
21. Click Save.

22. You will now have your normal right mouse menu
back. So now clean up all icons which need tidying and snapshot
to save settings per window of icons. See Chapter 3 if you need
help.
23. Also remember to clean up and snapshot the Scalos
Workbench desktop window with the Ram Disk, Programs and System
Icons.
24. For more information please read the documentation.
Double click System, then Expansion,
Scalos and Scalos_eng.guide Icons.
|
|